

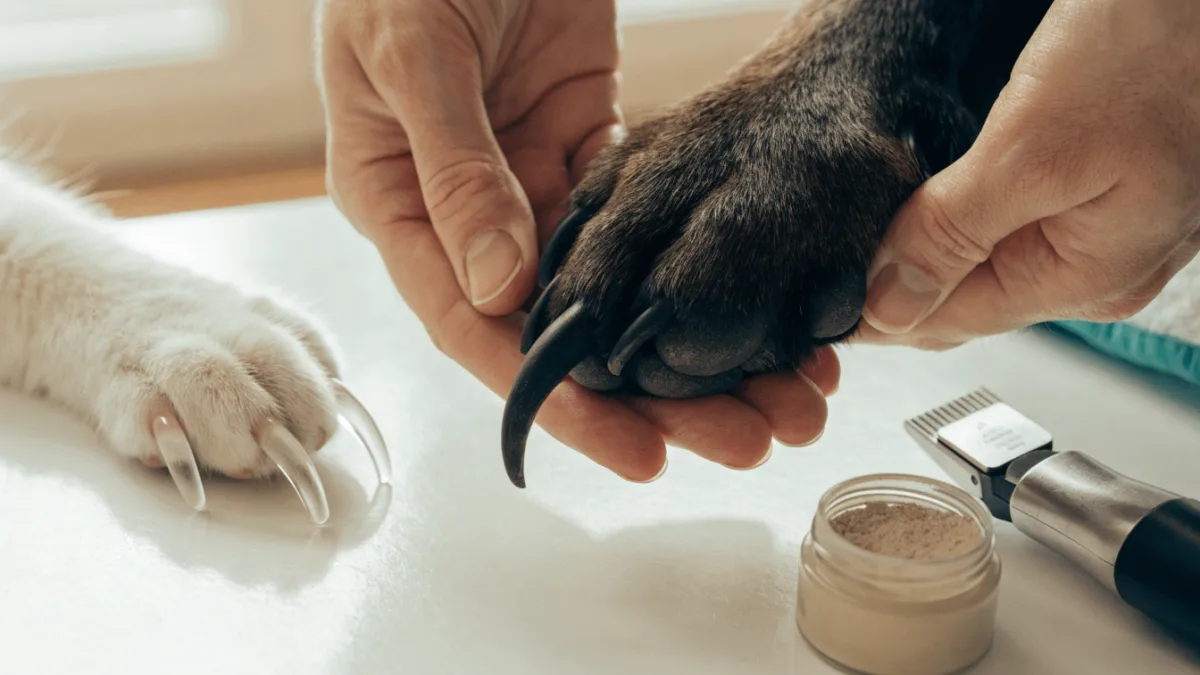
Let me tell you about the day I met a 70-pound Labrador named Bruno. His owner, Karen, walked into my exam room looking like she’d survived a war. There was blood on her shirt, her hands were shaking, and Bruno was hiding behind her legs, tail tucked. “I just tried to trim his nails,” she whispered. She’d hit the quick on three of his black nails before she even realized what was happening. The bathroom looked like a crime scene, Bruno was traumatized, and Karen was ready to surrender him to anyone who could handle his paws. Now, I see Brunos and Karens in my practice every single week. Nail trimming — especially on dark-nailed dogs — has become one of the most feared tasks in pet parenthood, and honestly, it doesn’t have to be that way. Whether you’re dealing with a dog’s thick black nails or a cat’s delicate clear claws, understanding what’s inside that nail changes everything.
What’s Really Inside That Nail? Understanding the Quick
Every dog and cat nail has a structure inside it called the quick — a soft core of blood vessels and nerve endings that runs from the toe down through the center of the nail. Think of it like the living pulp inside a human tooth. It’s sensitive, it bleeds when nicked, and it’s the reason so many pet owners break into a cold sweat at trimming time.
In clear or light-colored nails — which is what most cats have, along with some dogs with white or tan coats — the quick is visible as a pink stripe running through the nail. You can literally see what to avoid. But in dark or black nails, which are incredibly common in breeds like Labradors, Rottweilers, German Shepherds, and many mixed-breed dogs, that quick is completely invisible from the outside. The nail is essentially an opaque tunnel, and you’re working blind.
Here’s the good news that I wish more people knew: the quick is not some unpredictable booby trap. It follows a predictable path, and with the right technique, you can trim even the darkest nails safely and confidently. It just takes patience and a different approach than you’d use on a clear claw.
Trimming Dark Dog Nails: The Slice-by-Slice Method
There’s a stubborn myth that still circulates in some grooming circles — and honestly, I’ve even heard it from a few old-school veterinarians — that black dog nails simply can’t or shouldn’t be trimmed at home. This is absolutely false, and it does a real disservice to pet owners. Black nails are absolutely manageable when you use what I call the “tiny slice method.”
What You’ll Need
For dogs, you want a robust pair of nail clippers — either scissor-style or guillotine-style, both work well. Look for clippers with a sharp, clean cutting blade because dull blades crush the nail rather than slicing cleanly, which splinters the nail and hurts your dog. If your dog is large with thick nails, invest in a heavy-duty pair sized appropriately. Don’t try to trim a Great Dane’s nails with clippers meant for a Chihuahua.
The Technique: Small Slices, Not Big Chops
Here’s where the magic happens. Instead of taking a big chunk off the nail — which is what most people instinctively do — you’re going to snip off tiny 1-millimeter slices at a 45-degree angle, working from the tip backward. After each tiny snip, stop and look closely at the freshly cut face of the nail. Use your phone’s flashlight if you need to.
What you’re looking for is a small white or gray circle, sometimes appearing as a dark dot, right in the center of the cut surface. That dot is the very beginning of the quick — your warning sign that you’re getting close. The moment you see it, stop trimming that nail. You’ve reached the safe limit. If you continue past that point, you’ll cut into living tissue and cause bleeding.
I had a client named Marcus with a senior black Labrador named Diesel. Diesel’s nails had been neglected for months because his previous groomer refused to touch black nails (yes, really). Using this slice method, we worked through all eighteen of Diesel’s nails over the course of about twenty minutes. Not a single drop of blood. Marcus texted me later that week to say he’d done it himself at home successfully for the first time ever. Once you see that dot, you never forget what it looks like.
The 45-Degree Angle Matters
That angled cut isn’t arbitrary. Trimming at roughly 45 degrees matches the natural shape of the nail as it grows and contacts the ground. A flat cut leaves sharp edges that catch on carpet and scratch floors. The angle also gives you a wider surface area to inspect for that crucial dot after each slice.
Clipping Cat Claws: A Different Animal Entirely
Cats are a completely different conversation. Their claws are thinner, curved like hooks, and in the vast majority of cats, they’re clear — meaning you can see that pink quick running through the center with no guesswork involved. This makes cat claw trimming significantly more straightforward in terms of knowing where to cut. The challenge with cats isn’t anatomy; it’s cooperation.
The Right Tools for Feline Claws
Cats need smaller, sharper clippers than dogs. Look for scissor-style clippers specifically designed for cats — they’re typically smaller and have a finer blade that makes a clean cut through the thin claw without crushing or splintering it. Using large dog clippers on a cat’s claw is like using hedge trimmers on a rose bush. You’ll damage the surrounding tissue and your cat will remember.
The Technique: Just the Hook
Gently press your cat’s paw pad to extend the claws naturally. Once the claw is fully extended, locate the pink quick inside. Now, here’s the key difference from dogs: you only need to clip the sharp, curved hook at the very tip of the claw. Stay well clear of that pink area — give yourself a comfortable margin of at least two millimeters of clear claw between your cut line and the quick.
Cat claws are designed to shed their outer layers (you may have found these translucent claw husks around your home — completely normal), so the hook portion is mostly dead keratin with no nerve supply. A clean snip of just that hook is painless and quick.
The Real Challenge: Getting Your Cat to Hold Still
My patient Olive, a four-year-old calico, would launch herself off her owner’s lap like a furry cannonball the moment the clippers appeared. What worked for Olive was desensitization: her owner spent a week just touching Olive’s paws gently during cuddle time, then another week holding the clippers nearby during treats, then pressing the paw pads without cutting. By week three, Olive tolerated one or two claws per session. A month later, all ten front claws were done in a single sitting. Patience isn’t optional with cats — it’s the entire strategy.
Tools of the Trade: Clippers Versus Grinders
There’s an ongoing debate in the grooming world between traditional clippers and nail grinders (essentially a rotating sandpaper drum, similar to a Dremel tool). Both have real merit, and I’ve changed my mind over the years about which I recommend.
Grinders file the nail down gradually, making it almost impossible to accidentally hit the quick. You can see the surface being sanded in real time and stop the moment you approach danger. For nervous owners working on dark nails, grinders offer incredible peace of mind. They also leave a smooth, rounded edge that won’t snag on fabric.
The downside? Many dogs find the vibration and buzzing sound genuinely terrifying. Introducing a grinder takes the same kind of patient desensitization I described for Olive. Some dogs never accept them. I usually suggest that pet owners who are particularly anxious about dark nails consider a grinder as an alternative or supplement to clippers, with the understanding that it’s a tool that requires its own acclimation period.
When Things Go Wrong: Handling Pet Nail Bleeding
Even with perfect technique, accidents happen. You might hit the quick because your dog suddenly jerked, or you misjudged an angle. The first thing I tell every pet owner is this: take a deep breath. Nail bleeding looks dramatic — there’s often surprising amount of blood for such a small wound — but it is not a medical emergency.
Here’s what to do if you nick the quick:
- Stay calm. Your pet will pick up on your anxiety and become harder to handle.
- Apply styptic powder directly to the bleeding nail with firm pressure for 30 to 60 seconds. This is the fastest, most reliable way to stop nail bleeding, and I recommend every pet owner keep some on hand.
- If you don’t have styptic powder, cornstarch or plain flour works as a substitute. Pack it onto the nail tip and hold firm pressure.
- A clean bar of soap pressed gently against the nail can also help seal the wound in a pinch.
- Avoid letting your pet lick the bleeding nail excessively — keep them distracted with a treat or toy while the bleeding stops.
The bleeding typically stops within five to ten minutes with firm pressure and styptic powder. Your pet may be sore on that foot for a day or two, and you might see a tiny bit of dried blood on surfaces, but no lasting harm is done. If bleeding hasn’t stopped after 15 minutes of continuous pressure, or if your pet seems unusually distressed, call your veterinarian.
Setting Up for Success: Behavioral Foundations
The single best thing you can do for successful nail trims has nothing to do with clippers or technique — it’s about handling. Long before you introduce any tool, get your pet comfortable with having their paws touched, held, and manipulated. This is especially important for puppies and kittens, but even adult rescue animals can learn to tolerate it with time.
Start by simply touching your pet’s paws during relaxed moments — while they’re sleeping on your lap, during grooming, or at the end of a walk. Hold each toe gently, press the pad to extend the nail, and release. Pair every interaction with a high-value treat: small pieces of cooked chicken, freeze-dried liver, whatever your pet finds irresistible. The goal is to create a positive association so strong that paw handling predicts good things.
When you do introduce clippers, let your pet sniff and investigate them first. Hold them near the paw without cutting. Clip the air a few times so they hear the sound. Only attempt an actual trim when your pet is calm and relaxed. If they pull away or seem anxious, stop and try again later. One successful nail is better than ten nails and a traumatized pet who won’t let you near their feet for months.
For dogs especially, tired is good. A long walk or play session before trimming means a calmer, more cooperative patient. I always tell my clients: trim nails after exercise, not before.
How Short Is Short Enough?
One of the most common questions I get is how short nails should actually be. The general rule is that when your dog is standing normally on a flat surface, their nails should not touch the ground. If you hear clicking on hard floors, they’re too long. Overgrown nails force the toes to splay, alter the paw’s angle, and over time can cause joint pain and even skeletal changes in the feet.
If your pet’s nails are significantly overgrown, don’t try to fix them in one session. The quick grows along with the nail, so a neglected nail has an equally overgrown quick inside it. Trimming a small amount every week to ten days causes the quick to gradually recede, allowing you to safely shorten the nails over time. This process — called quick receding — takes patience, but it’s the only safe way to address severely overgrown nails without causing repeated pain and bleeding.
Cats who go outdoors or use sturdy scratching posts may naturally wear down their claws and need less frequent trimming. Indoor-only cats with limited scratching opportunities typically need a trim every two to three weeks to keep those hooks from catching on fabric — or on your arms during playtime.
Nail trimming doesn’t have to be the stressful, blood-soaked ordeal that so many pet owners fear. Understanding the anatomy you’re working with, choosing the right tools, and approaching the task with patience transforms it from a dreaded chore into routine maintenance. The confidence you build — one tiny slice at a time — is worth every minute of effort. Your pet’s comfort, mobility, and joint health depend on those nails being well-maintained. And honestly, there’s something deeply satisfying about looking at a freshly trimmed paw and knowing you did that yourself, safely and well. Your dog won’t thank you in words, but the way they walk — lighter, more balanced, without those overgrown nails forcing their toes apart — is all the gratitude you need.