

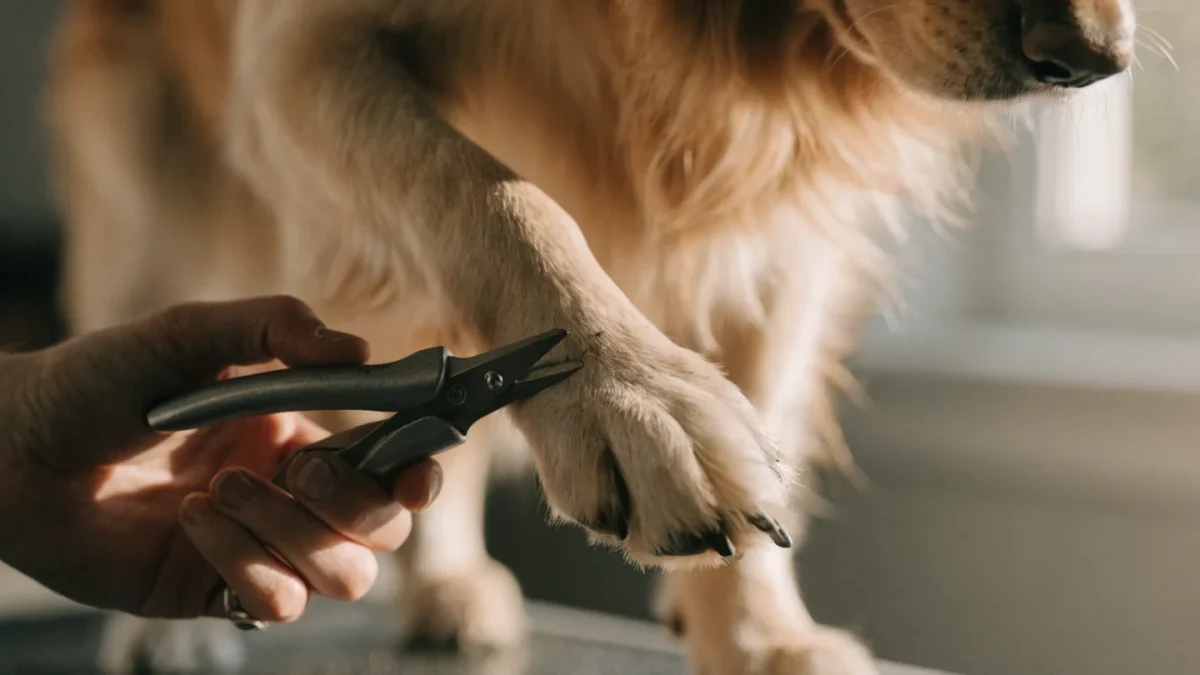
The first time I trimmed a dog's nails, I was fourteen years old and the dog was a Jack Russell named Pepper who belonged to my aunt. I cut the quick on the fourth nail, blood appeared, Pepper yelped, I yelped, and my aunt gave me a look that suggested I would not be doing this again for some time.
That was thirty-plus years ago. I've since trimmed the nails of hundreds of dogs and cats across dozens of breeds — from the needle-fine claws of Somali cats to the thick, curved horn-like nails of elderly Basset Hounds who'd gone too long between trims. And what I've learned is that the fundamentals are simple, the technique is learnable by any patient adult, and the mistakes most people make are preventable.
Nail trimming is one of those tasks that owners avoid disproportionately. The fear of hitting the quick, the dog's resistance, the general messiness of the whole thing — it gets postponed until the nails click on every floor in the house and the dog is essentially walking on stilts. But neglected nails cause real orthopedic consequences. This guide covers everything needed to do this well, at home, without drama. For the full scope of at-home pet care, the complete bathing guide for dogs and cats and the complete guide to cat grooming cover the other essential tasks alongside nails.
Why Nail Length Matters
Nails that are too long exert upward pressure on the toe joints when the dog walks. Imagine wearing shoes two sizes too small and having your toes constantly pushed back. Over months, this alters gait and puts strain on the entire leg structure — joints, tendons, and the spine.
In dogs: long nails shift weight toward the back of the foot, which strains the flexor tendons and metacarpal bones. In cats: long nails catch on carpets and upholstery, get painful ingrown, or curve back into the paw pad entirely.
The quick — the blood vessel and nerve that runs through the nail — also grows longer when nails aren't trimmed regularly. This creates a vicious cycle: owners who trim rarely face longer quicks, which means there's less safe nail to remove, which means they trim less aggressively, which means the quick grows longer still.
Regular trimming — every three to four weeks for most dogs — keeps the quick receded and makes each session quick and easy.
Tools and Equipment
Scissor-style clippers (also called bypass clippers): Two sharp blades that cross like scissors. Excellent for cats and small to medium dogs. More precise than guillotine style. My personal preference for anything under forty pounds.
Guillotine-style clippers: A hole the nail goes through; a blade drops to cut. Common, inexpensive, effective — but the blade dulls faster than scissor style, and dull guillotine clippers crush rather than cut, which is painful and contributes to nail splitting.
Plier-style (heavy-duty) clippers: The standard choice for large breeds with thick, hard nails. More mechanical advantage, cleaner cut on dense nail material.
Nail grinders (Dremels): Rotary tools that sand the nail down rather than cut it. Excellent for dogs who have experienced trauma from clipping, dogs with very dark nails where the quick is hard to see, and dogs with thick nails that splinter when clipped. Takes longer but gives more control. See nail grinder vs clipper dogs for a full comparison.
Styptic powder: Stops bleeding if the quick is cut. Keep it on the table before you start. Cornstarch is an adequate substitute in an emergency.
Treats: Not optional. High-value, small, and plentiful.
Whatever clippers you use: they must be sharp. Sharp clippers cut cleanly; dull clippers crush and split. Replace or sharpen blades when they start pulling rather than cutting.
Understanding the Quick
The quick is the pink tissue visible inside light-colored nails. It contains a blood vessel (which bleeds when cut) and a nerve (which causes pain). The goal of nail trimming is removing the outer keratinous shell of the nail without reaching the quick.
Light-colored nails: Look for the pink shadow inside the nail. The safe zone ends a few millimeters before that pink region begins. You'll develop an eye for it after a few sessions.
Dark or black nails: The quick is invisible from the outside. The technique here is to take small cuts — 1–2mm at a time — and examine the cut surface after each. The nail's cross-section changes as you approach the quick: the outer shell is opaque and dry, but as you near the quick, a small dark circle or oval appears in the center of the cut surface. That dark dot is your warning: you're close. Stop at that point.
For dark nails specifically, a grinder offers more control because you can work millimeters at a time and stop the moment you see the color change. See finding the quick on dark dog nails for a detailed visual guide.
Positioning and Restraint
The right position matters as much as the right tool. For dogs:
On a non-slip surface at a comfortable height. Bending over a dog on the floor is harder than it sounds and puts you in a mechanical disadvantage. A grooming table or raised surface is the ideal — but a folded blanket on a dining table works. The dog needs grip to feel stable.
Small dogs can often be held on your lap or cradled in one arm against your body. Front paw: bring the paw backward (not forward) so the nail faces you. Back paw: easier — extend back gently, support the leg.
Large dogs: a standing dog held against your knee or hip works for front paws. Rear paws are easiest with the dog lying on its side, which requires some desensitization training first.
Cats: the classic "burrito wrap" in a towel, exposing one paw at a time, works for cats that are resistant. For tolerant cats, sitting with the cat on your lap, paw extended, is fine.
Never hold a leg at an unnatural angle. Pain from restraint is a training setback disguised as a resistance problem.
Step-by-Step Technique
-
Have everything ready before the dog is in position: clippers, styptic powder, treats.
-
Hold the paw firmly but without squeezing. Press gently on the top of the paw — this extends the nails slightly.
-
Identify the safe cutting point. Light nails: 2mm before the pink quick. Dark nails: start conservatively.
-
Position the clipper perpendicular to the nail (straight across). Cutting at an angle toward the quick reduces margin for error.
-
Make a single confident cut. Hesitating and applying partial pressure before committing to the cut is harder on the nail and more stressful for the dog. One decisive squeeze.
-
Check the cut surface. On dark nails, look for the central dark circle that indicates proximity to the quick.
-
Treat. Move to the next nail.
-
Do all four feet. Don't forget the dewclaws — the small nail up the inside of the leg that never contacts the ground and grows in a curve. See dewclaw trimming for why these are different.
A complete trim for a cooperative dog: ten to fifteen minutes. A first session with a resistant dog: you may do one paw and call it success. That's fine.
If You Hit the Quick
It will happen at some point. Stay calm — this is a 90% emotional event and 10% medical one. A cut quick bleeds and stings briefly. It's not dangerous.
Apply styptic powder immediately — dip the nail tip into the powder or press a pinch directly against the nail. The bleeding stops within thirty seconds to two minutes.
Don't panic in front of the dog. Dogs read anxiety. A calm "oops, let's fix this" response followed by treats is far better than the owner's distress informing the dog that something terrible has happened.
Assess the session: if the dog seems to have forgotten within a minute and is taking treats, continue. If the dog is genuinely shaken, stop for the day. Never push through a session after a significant incident.
Training Dogs (and Cats) to Accept Nail Trims
Nail trim anxiety is one of the most common grooming challenges, and it's almost entirely preventable through early habituation — and largely reversible through patient desensitization in adult dogs.
The core principle: the nail trim session should never be the first time paws are touched, clippers are seen, or pressure is felt on the nails.
Paw handling: Touch and squeeze paws daily from puppyhood. Not just a quick touch — actually hold the paw, press each toe, manipulate each nail. Make it a treat-associated routine. Puppies habituated to paw handling during the socialization window become adults who barely notice nail trims.
Tool desensitization: Let the dog sniff and investigate the clippers while you treat. Touch the clippers to the paw without cutting — treat. Make a clipping sound near the paw — treat. This staged exposure prevents the specific tool-triggered panic that some dogs develop.
Nail touching: A gentle squeezing pressure on each nail before any trimming teaches the dog that nail pressure doesn't mean pain. Many dogs who "hate" nail trims actually have a conditioned response to the pressure sensation, not the actual clipping.
For dogs with established anxiety, the desensitization process is similar but slower. See handling nail trimming anxiety in dogs for specific protocols.
Puppies: Start Early
The ideal nail trim schedule for puppies: begin at three to four weeks (the breeder's job), and the new owner should continue from the first week home. Puppy nails are soft, thin, and trim easily in seconds. The point of trimming at this age isn't length management — it's habituation.
Weekly brief sessions with lots of treats in the first three months creates an adult dog who considers nail trims unremarkable. Skipping this and attempting a first adult-dog nail trim at eighteen months on an untouched paw is a very different experience for everyone.
Cats: The Unique Considerations
Cat nails are retractable — fully extended claws are visible only when the cat is alarmed, stretching, or kneading. To extend the claw for trimming: press gently on the top of the paw while simultaneously pressing on the pad below the toe with your thumb. The claw extends.
Cat nails have a sharp, curved point — the tip. Trim just the sharp point, staying well clear of the pink quick visible inside the curved nail. For cats, you're rarely trying to shorten the nail dramatically — just removing the needle-sharp tip that damages furniture and skin.
Most cats need trimming every two to four weeks. Older or indoor-only cats may need more frequent attention as their scratch-and-file behavior decreases.
The detailed cat nail guide is at trimming cat nails at home.
Frequency Guidelines
| Dog Type | Trimming Frequency |
|---|---|
| Active dogs on pavement | Every 6–8 weeks (surface wear helps) |
| Indoor/carpet dogs | Every 3–4 weeks |
| Small breeds | Every 3–4 weeks (nails grow faster relative to body size) |
| Senior dogs | Every 3–4 weeks (nails thicken and grow differently) |
| Puppies (habituation) | Weekly, very small amounts |
The "you can hear the nails clicking on the floor" indicator is actually late. Nails should be short enough that there's no audible contact with hard floor.
When to See a Professional
Some situations genuinely call for a groomer or veterinarian rather than a home trim:
Dogs that cannot be safely handled at home without risk of serious injury. Nails that have grown into the paw pad (this is a veterinary situation requiring potential sedation). Nails that are severely overgrown and have extremely long quicks — working these back to a short length requires multiple sessions and professional judgment. Any sign of nail infection: discharge, swelling, discoloration, abnormal smell.
And the entirely legitimate answer: you don't want to. Regular professional nail trims cost very little and are a completely reasonable ongoing choice. The dog probably finds it less stressful with someone who does this all day.
Frequently Asked Questions
My dog's nails are black. I'm scared to cut them. What do I do?
Start with a nail grinder at low speed — the visual feedback from the changing surface texture as you approach the quick is clearer than with clippers. Take tiny amounts. Invest in the guide to finding the quick on dark nails. The first time is the hardest; it genuinely gets easier.
How do I know if my dog's nails are too long?
Standing on a flat surface, the nails should not contact the floor. If you hear clicking, they're too long. If the nails look like they're curving and starting to wrap around, they're very too long.
My cat fights me every time. Is there a better approach?
The towel burrito. One paw out at a time. Two to three nails per session if needed — cats have five front claws and four rear claws (unless polydactyl). You don't have to do all eighteen at once.
Can I use dog nail clippers on a cat?
Technically yes, but the mechanism and angle are different enough that cat-specific clippers (smaller, scissor-style) work better. A smaller tool gives you more precision on a cat's finer nail.
What's the worst that can happen if I never trim nails?
Long-term: gait changes, joint stress, increased risk of nail catching and tearing. Worst case: a nail curves so far it grows into the paw pad, causing pain, infection, and a veterinary intervention. This is avoidable. Trim the nails.
My vet trims nails at every visit. Is that enough?
If your vet visit frequency matches your dog's trimming needs (every three to four weeks), yes. More likely, vet visits happen every six to twelve months and the nails need attention in between. Incorporate home trimming between vet visits.