

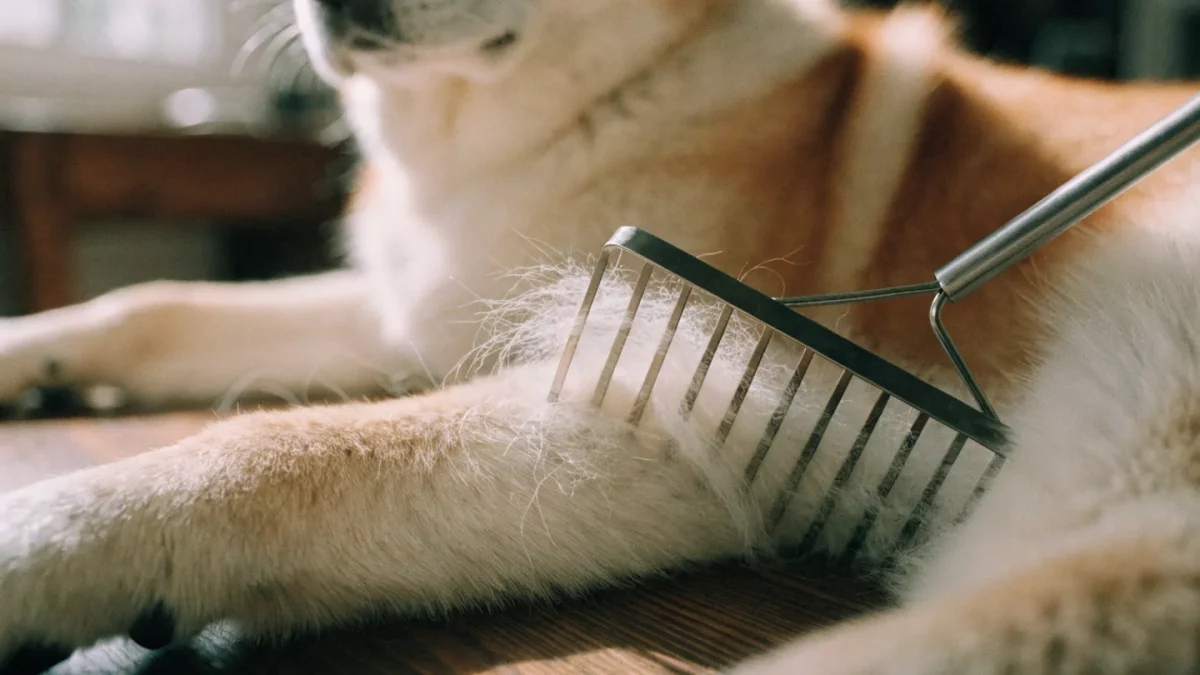
The undercoat rake might be the most underestimated tool in dog grooming. People buy slicker brushes, buy deshedding blades, sometimes buy both — and still end up with dogs that look fine from outside while hiding a dense, compacted undercoat situation that's been building for months. The rake is what solves that. And using it correctly is about twenty percent selecting the right tool, eighty percent technique.
I want to walk through both, because I've watched enough people make the same mistakes — too much pressure, wrong angle, wrong tine length, raking the same spot repeatedly until the dog flinches. Undercoat raking should be thorough without being rough, and the dog should tolerate it well once you've got the mechanics right.
What the Rake Is Actually Doing
Before technique, a quick note on what you're trying to accomplish. When a double-coated dog sheds, the loose undercoat detaches from the follicle but remains trapped in the matrix of guard hairs and live undercoat above it. It doesn't fall out cleanly the way it does in single-coated breeds.
The undercoat rake's long tines are designed to push through the outer guard coat and catch that disconnected undercoat from below. You're not just surface brushing — you're fishing out everything that's tangled beneath. If you've only ever used a slicker brush on a double-coated dog, the first time you follow up with a rake on the same coat, the amount of additional fur that comes out will make you seriously question what that slicker was even doing.
Choosing the Right Rake
Tine length matters. A rake with 2-inch tines is adequate for most medium-density double coats — Border Collies, German Shepherds in normal coat, Golden Retrievers. For high-volume, high-density coats — Samoyeds, Great Pyrenees, Alaskan Malamutes — you want 2.5 to 3-inch tines. Too-short tines don't reach the undercoat on a thick coat; they just scratch the surface.
There are two main tine configurations: single-row rakes and rotating-tine rakes. Single-row rakes, which look like a wide-tooth comb with a handle, give you more control and tactile feedback. You can feel when you've hit resistance, which tells you you've reached either the skin or a developing mat. Rotating-tine rakes are gentler on the skin and work well for dogs who are sensitive or new to raking — the pins rotate when they meet resistance rather than pulling.
For most people, a single-row rake is the better starting tool because the feedback helps you learn the technique. Once you're comfortable with the process, a rotating-tine model can be a useful addition.
Pin spacing matters too. Wide-spaced tines (8-10 pins across) work well for initial passes through dense coats. Narrower spacing catches finer, softer undercoat after the bulk is removed. Honestly, most people do fine with one medium-spacing rake and careful technique.
Technique Step by Step
Set Up the Dog Comfortably
A dog that's standing comfortably, with access to their full body, is much easier to work than one that's trying to turn around to see what you're doing. A grooming table is ideal — it positions the dog at your working height and reduces the instinct to sit or lie down. If you're working on the floor or a regular table, have treats nearby to reward standing and staying.
The first few times you use a rake on a dog that hasn't experienced it before, go slowly. Let them sniff the tool. Start on the back — not the belly, not the legs — and use light pressure. Build from there once they're comfortable.
Section the Coat
Don't try to rake the whole dog in one long sweep. Work in sections, using your non-dominant hand to hold the coat behind your work area. This gives you cleaner control, prevents the tines from dragging on skin you've already covered, and helps you confirm you've thoroughly covered each section.
A logical sectioning order: start at the back, work forward. Then do the sides, the chest, the legs, the tail, and finally the neck and behind the ears. Leave the face and head for last (and use a soft slicker rather than a rake near the face — rake tines near eyes are uncomfortable at best).
Stroke Direction and Pressure
Work with the direction of coat growth — generally from back to front on the body, following the natural lay of the guard hairs. This is less disruptive than raking against the grain, and it produces cleaner results because the tines pass through the guard hairs rather than catching on them.
The stroke should be firm enough that the tines reach through the guard coat but not so heavy that you're pressing on skin with each stroke. Light to medium pressure. Let the tool's length do the work — you're guiding it, not forcing it.
Short strokes (4-6 inches) give you more control and feedback than long sweeping passes. Long strokes across the whole back feel efficient but miss the undercoat at the beginning and end of the stroke. Overlap your sections as you go.
Reading the Resistance
This is where experience makes a real difference. As you rake, you'll feel varying resistance levels:
- Light resistance: normal undercoat coming loose. Good. Keep going.
- Firm but even resistance: denser undercoat or you've reached a fully intact area. Slow down, work shorter strokes, confirm you're reaching skin depth.
- Localized firm resistance that moves: a developing mat. Don't force the rake through it. Stop, work on the mat separately (see below), then resume.
- Resistance at the skin level: you've found the floor. The tines are reaching skin, which is where they need to go. Good technique.
If you can't tell whether you've reached skin level, follow the rake with a metal comb on the same section. If the comb passes through smoothly from skin level to tip, you've done the job. If the comb stalls, there's still undercoat below where the rake reached.
The High-Friction Zones
Give extra attention to the areas where mats form fastest: the collar zone, behind the ears, the armpits, the area where the leg meets the body (especially the back legs), and the base of the tail. These spots accumulate shed undercoat faster than anywhere else because friction from movement compresses the loose fur.
I usually go over these areas twice — once in the normal sectional sequence, once as a dedicated pass at the end. The armpit area especially benefits from a separate, careful pass since it's easy to rush through and the skin there is sensitive.
When You Hit a Mat
Stop raking. Don't pull through it.
Small mats (smaller than a grape) can often be worked out by holding the fur at the base — between your fingers, right at the skin — and carefully working from the edges inward with the rake or a mat comb. Holding the base prevents the pulling force from reaching the skin, which makes the process much more comfortable for the dog.
Medium mats need a mat splitter to divide them into smaller sections, then each section worked out individually. Large mats — anything compacted flat against the skin, or covering a palm-sized area — need scissors or a professional. Don't try to rake through them.
Identifying developing mats early is the main reason regular raking matters. A mat that's been there two weeks is a grooming job. A mat that's been there two months is a veterinary-adjacent situation.
Frequency
For maintenance grooming (not during coat blow), raking once every one to two weeks is appropriate for most double-coated breeds. Samoyeds and Great Pyrenees benefit from weekly sessions. German Shepherds and Huskies can often go every ten to fourteen days in the off-season.
During coat blow — the two seasonal periods when the undercoat mass-sheds — daily raking is not excessive. The volume of disconnected undercoat during these periods overwhelms the guard coat's ability to hold it, and without daily removal, it compresses rapidly. See the full picture of grooming double-coated dogs for how raking fits into the seasonal schedule.
What Raking Doesn't Replace
The rake is the workhorse, but it doesn't work in isolation. It's most effective after a pre-groom dry brush (slicker brush to remove surface debris and separate the outer coat before the rake goes in) and should always be followed with a metal comb to confirm thoroughness.
It also doesn't replace the bath-and-blow-dry process — which physically ejects loose undercoat from the coat in a way no brush or rake can match. For deshedding tools and technique during coat blows, a Furminator-style blade works differently than a rake and serves a different purpose. The two aren't interchangeable, and understanding when to use each one is what makes a grooming routine actually work.
FAQ
How hard should I press with an undercoat rake?
Firm enough that the tines reach through the guard coat to the undercoat below — but not so hard you're pressing metal against skin on each stroke. If you can hear the tines clicking against skin, lighten up. You should feel light to moderate resistance from the fur, not from the dog's body. If the dog flinches or moves away, you're pressing too hard.
My dog hates being raked. What do I do?
Start with very short sessions — two minutes, with treats throughout, ending on a good note before the dog gets uncomfortable. Work only on the back initially, where most dogs are less sensitive. Rotate-tine rakes cause less discomfort than fixed-tine rakes for sensitive dogs. Gradually build duration. Some dogs who were never groomed as puppies have skin sensitivity that takes weeks of short sessions to desensitize. Don't force a full session on a resistant dog — it creates a fight that gets harder to undo.
Can I use an undercoat rake on a wet dog?
No. Wet undercoat compresses and tangles more easily, and raking wet coat drags rather than collecting. Always work on dry coat. This is why the brush-out before bathing is the rule — get loose undercoat out first, then bathe, then dry completely before the post-bath brush sequence.
The rake seems to pull out a lot of fur. Is that normal?
Yes, especially on the first few sessions or during coat blow season. If the rake is pulling out clumps of white or gray-toned soft fur, that's disconnected undercoat doing exactly what it should — coming out. If you're seeing larger clumps that include skin or causing visible thinning in the guard coat, ease up on pressure or frequency. The goal is to remove what's already shed, not to strip live coat.
How do I know when I'm done raking a section?
The metal comb test: run it through the section from skin to tip. If it moves freely, you're done. If it stalls, there's still undercoat below where the rake reached. On a particularly dense dog or during coat blow, it may take multiple rake passes before the comb moves freely — that's normal. Don't rush it.