

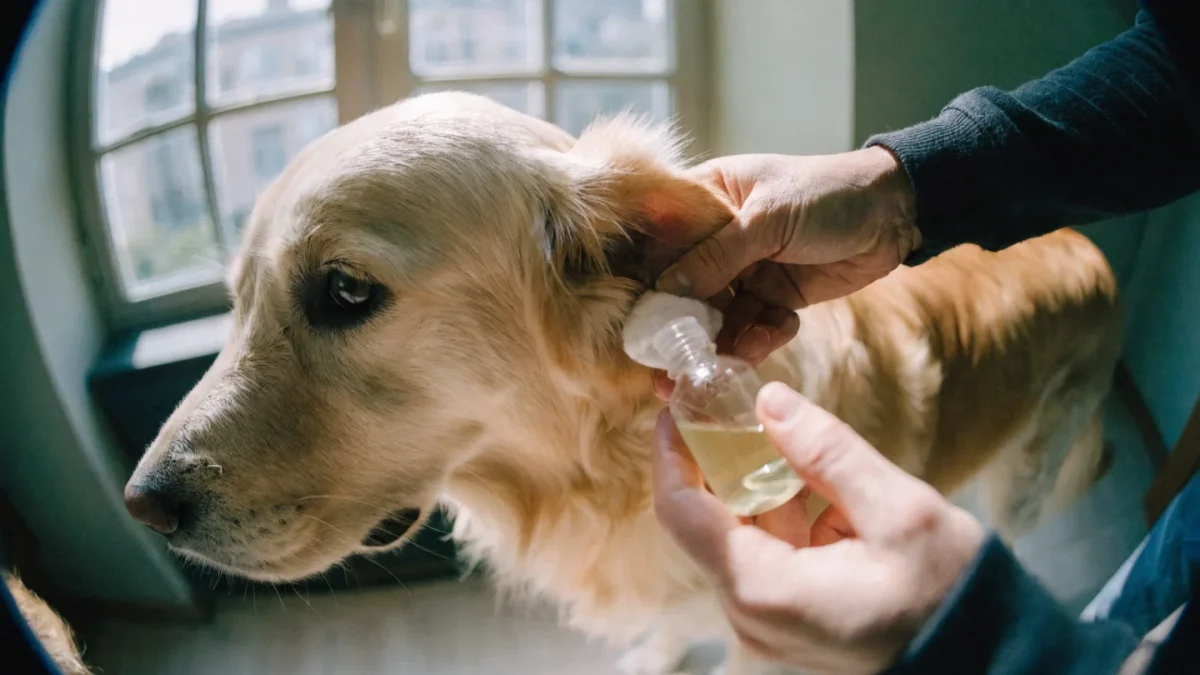
The Golden Retriever mix I grew up with had chronic ear infections from age three onward. Every six to eight weeks: head shaking, pawing at the ear, a smell that announced itself from across the room, and a visit to the vet. Looking back, the pattern was entirely preventable. The vet told us to clean her ears more regularly. We did it twice, felt uncertain about the technique, and stopped.
The infections continued for years.
Ear cleaning is one of those grooming tasks that owners either do confidently or not at all — there's very little middle ground. If you're building a complete home grooming routine, the bathing dogs and cats complete guide and pet nail trimming complete guide pair well with what you'll find here. The "not at all" group tends to discover, eventually, that their dog or cat has been quietly brewing an ear problem that a consistent cleaning routine would have interrupted.
This guide covers everything: anatomy, why cleaning matters, the right solution, correct technique, breed-specific considerations, and how to recognize when what looks like a dirty ear is actually an infection that needs treatment.
Dog and Cat Ear Anatomy: Why It Matters
Understanding the structure of a dog's ear canal changes how you approach cleaning and makes the whole process less intimidating.
Dogs have an L-shaped ear canal. The outer vertical canal descends downward, then turns 90 degrees horizontally toward the eardrum. This shape — dramatically different from the roughly straight human ear canal — is why dogs are more prone to ear infections than humans. Debris, moisture, and wax settle at the bottom of the L where air circulation is poor, creating ideal conditions for bacterial and yeast growth.
Cats have a similar structure, though generally with better natural ventilation and drainage.
The visible outer ear (pinna) leads into this canal. You can gently look into the vertical canal with a flashlight; the eardrum is deep and around the bend where you can't see and can't reach without specialized instruments.
Cleaning targets the outer and vertical canal — the accessible portion. Properly done home cleaning does not and should not reach the eardrum or the horizontal canal.
Why Regular Cleaning Matters
Ears produce cerumen (wax) as a normal, healthy process. Cerumen carries debris and dead skin cells outward through the canal — a self-cleaning mechanism that works well under normal circumstances.
Disruptions to this system — excessive wax production, poor ventilation from heavy ear flaps, moisture trapped after swimming, dense hair blocking the canal opening — overwhelm the natural self-cleaning process. Wax accumulates, bacteria or yeast (Malassezia pachydermatis is particularly common in dogs) find the warm moist environment favorable, and infection develops.
Regular cleaning interrupts this cycle before infections establish. For breeds prone to ear problems — Cocker Spaniels, Basset Hounds, Labs, Poodles, any dog that swims regularly — cleaning after every bath, swim, and every two to four weeks routinely is standard preventive care.
For cats: most healthy cats with erect ears (Domestic Shorthairs, Siamese, Abyssinians) rarely need intervention beyond an occasional wipe. Long-eared cats, those with narrow canals, or cats prone to waxy buildup need more regular attention.
Choosing an Ear Cleaning Solution
Not all ear cleaners are equal, and the choice matters.
Veterinary ear cleaning solutions (available without prescription at pet supply stores or from your vet) are the gold standard. They're formulated to gently loosen wax and debris, support the natural pH of the ear canal, and often contain drying agents to help prevent moisture accumulation. These are the right choice for routine maintenance.
What to look for: solutions containing salicylic acid, lactic acid, or specific surfactants designed for ears. Some contain mild antifungal agents (like climbazole) that reduce yeast colonization.
Witch hazel is sometimes suggested as a natural alternative for dogs without active infection. It's gentler than rubbing alcohol and mildly astringent. Acceptable for very light maintenance cleaning on healthy ears, but not as effective as purpose-formulated cleaners for dogs prone to problems.
Rubbing alcohol: dry but too harsh. It can irritate the delicate ear canal lining and is particularly damaging if there's any inflammation. Avoid.
Water alone: fine for wiping the outer visible ear, but insufficient for deep cleaning and leaves moisture in the canal that promotes bacterial growth.
Hydrogen peroxide: occasionally suggested, but it foams vigorously in the ear canal and can be distressing to the dog and temporarily disrupt the normal ear environment. Not recommended.
Apple cider vinegar: sometimes recommended for its acidic properties and mild antifungal effects. Acceptable very diluted (1:1 with water) for occasional maintenance on healthy ears. Never use on an inflamed or infected ear — the acidity is very painful on broken or irritated tissue.
Never use any solution if you suspect an active infection or if the eardrum may be compromised — all of these can cause serious harm if put into a ruptured eardrum.
Step-by-Step Technique for Dogs
Assemble everything first: cleaning solution, several cotton balls or cotton pads (never cotton swabs — Q-tips), treats, a towel to manage the inevitable shake.
Check the ear first: hold the ear flap back and look into the vertical canal. A healthy ear is pale pink, has minimal odor, and any wax is light tan. Dark discharge, strong odor, redness, or swelling are signs of infection — stop, do not clean, and make a vet appointment.
Apply the solution: with the ear flap held back, insert the tip of the solution bottle just into the opening of the ear canal. Squeeze enough solution to fill the canal — you'll hear it filling. For a large dog, this is typically 1–2ml. The solution should be at or slightly above room temperature — cold solution in the ear canal is genuinely startling.
Massage the base of the ear: with the ear flap still held back, use your fingers to gently massage the base of the ear (the area just behind and below where the ear meets the head). You'll hear a squelching sound as the solution moves through the canal and loosens debris. Thirty to sixty seconds of massage.
Let the dog shake: step back and let it happen. The shake is how the loosened material and excess solution are expelled from the canal. This is where your towel earns its place.
Wipe the outer ear: use cotton balls to wipe visible debris from the outer ear, the folds of the pinna, and the accessible portion of the vertical canal. Go only as deep as your finger can reach without force. Wipe once in each direction — don't scrub back and forth, which pushes debris further in.
Treat generously: immediately after. Ear cleaning isn't comfortable, but it should be associated with excellent things.
Step-by-Step Technique for Cats
Cats require more patience than dogs for ear cleaning — they tolerate it less well and the consequence of their displeasure (claws to the face) is more immediately personal.
The technique is similar but more conservative. Most cats need only the outer ear and visible entrance to the canal cleaned, not a full solution flush.
Wrap the cat in a towel (burrito-style) with one ear exposed. Tilt the head slightly. Apply a few drops of ear cleaning solution into the ear canal — a few drops rather than the larger volume used in dogs, appropriate for the smaller feline canal. Massage briefly at the base of the ear. Let the cat shake (secured in the towel, this is manageable). Wipe visible debris with a cotton ball. Repeat for the other ear.
For cats who object strongly to any solution, a dry cotton ball wiping the outer ear and visible canal entrance is better than nothing, though less effective for wax buildup.
Breed-Specific Considerations
Pendulous (floppy) ear breeds — Cocker Spaniels, Basset Hounds, Bloodhounds, Golden Retrievers, Setters: the ear flap creates a warm, poorly-ventilated environment that dramatically increases infection risk. These breeds should have ears cleaned every one to two weeks, and after every swim or bath. The ear flap itself should be lifted and held back between cleanings to improve air circulation. See breed-specific ear care for detailed guidance.
Hairy-eared breeds — Poodles, Bichons, Schnauzers, Shih Tzus: dense hair grows in the ear canal, trapping wax and debris. Some groomers pluck this hair; others trim it. See the specific discussion on this below.
Dogs that swim — Labs, Golden Retrievers, Portuguese Water Dogs, Spaniels: clean ears after every water exposure. Moisture is the single biggest controllable risk factor for ear infections in these breeds.
Cats with folded ears (Scottish Folds): the folded pinna creates particularly poor ventilation and a structurally different canal. These cats are much more prone to wax accumulation and infection than erect-eared cats. Monthly cleaning at minimum; more frequent monitoring.
Erect-eared breeds — German Shepherds, Beagles, most terriers, Siamese cats: better natural ventilation, generally lower infection risk. Clean when there's visible wax buildup or odor, or monthly as maintenance.
Hair in the Ear Canal
This is genuinely contested territory in veterinary and grooming circles.
The argument for removing ear hair (usually by plucking or trimming): it reduces the wax and debris trapping that leads to infections. Many groomers include it as a standard service for predisposed breeds.
The argument against plucking specifically: pulling hair from the follicles creates micro-wounds in the ear canal, which can become infection sites themselves. Some veterinary dermatologists have moved away from routine plucking for this reason.
The middle position: trimming hair at the canal entrance (rather than plucking from deep within) reduces debris trapping without creating follicle wounds. A detailed examination of this debate is in ear hair removal in dogs.
When Home Cleaning Isn't Enough
Certain findings require a vet visit, not a cleaning session:
- Dark brown or black discharge (often yeast infection)
- Yellow or green discharge (bacterial infection)
- Strong, foul odor (usually infection)
- Visible redness or swelling in the canal
- The dog cries, flinches, or shows pain when the ear is touched
- Head shaking that continues after a recent cleaning
- Scratching at one ear specifically and persistently
- Hearing changes or head tilting
Ear infections need proper diagnosis (a swab to identify whether the culprit is bacteria, yeast, or both, and which types) and appropriate treatment. Cleaning an infected ear can spread the infection deeper or cause significant pain — especially if the eardrum is compromised.
The line: cleaning prevents infections. It doesn't treat them.
Training a Dog to Accept Ear Cleaning
Many dogs hate ear cleaning initially — the sensation is unfamiliar and can be startling. Build tolerance the same way you'd desensitize any handling procedure:
Touch the ears and ear flap frequently without cleaning. Treat. Gradually introduce the solution with a brief touch of the bottle opening to the ear entrance. Treat. Build from there over several sessions.
Ear cleaning should be introduced to puppies early and often, during the same socialization period used for nail trims and bathing. A dog habituated to ear cleaning by twelve weeks accepts it throughout its life with minor grumbling at most.
Frequency Summary
| Dog Type | Recommended Cleaning Frequency |
|---|---|
| Erect-eared, no issues | Every 4–6 weeks, or as needed |
| Floppy-eared breeds | Every 1–2 weeks |
| After swimming/bathing | Within 24 hours of water exposure |
| Breeds with hairy canals | Every 2–4 weeks |
| Cats with erect ears | Monthly or as needed |
| Cats with folded ears | Monthly, more if prone to buildup |
Frequently Asked Questions
Should I clean my dog's ears before or after a bath?
After the bath, and consider cleaning after every bath regardless of ear type. Bath water enters the ear canal easily during rinsing. A cleaning immediately after the bath removes that moisture before it can sit and promote bacterial growth.
Can I use the same ear cleaning solution for dogs and cats?
Some formulations are labeled for both. Check the label. Dog-only products aren't necessarily safe for cats — some ingredients are fine for dogs but problematic for cats. When in doubt, use a feline-labeled product for cats.
My dog shakes its head after cleaning. Is that normal?
Yes — shaking is the natural mechanism for expelling solution and loosened debris. Expect it, step back, and use a towel. Head shaking that continues for more than a minute or two after cleaning may indicate the solution was startling or too cold, or that there's pre-existing irritation.
I can see dark wax deep in the canal. Should I try to remove it?
Only as deep as a cotton ball can reach without force. Dark wax deep in the canal is often best addressed by the solution and the dog's own shake rather than by manual intervention. Forcing objects deeper into the canal pushes debris toward the eardrum and risks damage.
My cat scratches after I clean its ears. Is the solution too strong?
Possibly — some cats react to certain cleaning solution ingredients. Try a gentler formula or a simple saline solution for cats with mild wax buildup. Post-cleaning scratching in cats sometimes also indicates the cleaning was more thorough than the cat found comfortable. Note whether the scratching resolves within ten minutes or continues — continued scratching suggests irritation worth investigating.
How do I know if I'm cleaning too often?
Over-cleaning is a real problem — it can disrupt the ear canal's natural flora and moisture balance. Signs of over-cleaning: ears that are always red or mildly irritated after cleaning, excessive dryness. If you're cleaning more than weekly as prevention, reduce frequency and discuss the underlying problem (predisposition to infections) with your vet.