

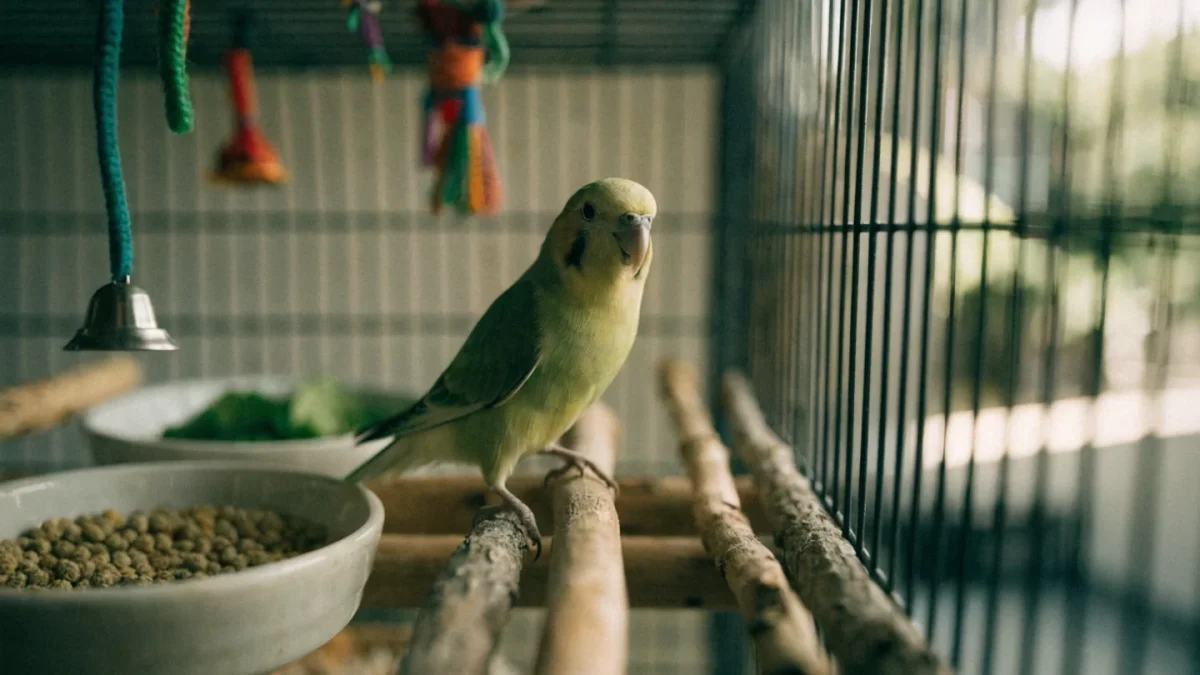
I once walked into a pet store and counted seventeen budgies crammed into a cage barely big enough for three. All of them were sitting on identical smooth dowel rods, eating from a single dish of dry seed. The staff called it "adequate."
A budgie cage setup determines how your bird moves, eats, plays, and sleeps — and getting it wrong causes problems that look behavioral but are actually environmental. Fluffed feathers, screaming, feather plucking, foot sores. Most of these trace back to the cage.
The right setup isn't complicated or expensive. But the default options that come with most cages — plastic dowels, a mirror, a tiny swing — aren't going to cut it.
Step 1: Choose the Right Cage Size and Shape
Budgies fly horizontally. Tall, narrow cages look impressive but waste space. What your bird needs is width.
Minimum for a single budgie: 76 cm long x 46 cm deep x 46 cm tall (30 x 18 x 18 inches). That's the absolute floor, not the target. For a pair, double the length or go with a flight cage that gives real room to move.
Bar spacing: 1 cm to 1.3 cm (roughly 3/8 to 1/2 inch). Wider bars let budgies wedge their heads through. I've seen rescue intakes with neck injuries from oversized bar spacing — entirely preventable with the right cage.
Horizontal bars on at least two sides let budgies climb. They use their beaks as a third foot on the bars, and vertical-only bars frustrate that instinct.
Skip round cages entirely. They disorient birds, offer no corners for security, and the bar convergence at the top can trap toes.
Step 2: Set Up Perches That Actually Protect Their Feet
The smooth dowel rods that ship with cages create constant pressure on the same spot of a budgie's foot. Over months, this causes bumblefoot — painful calluses and sores on the plantar surface.
Replace them with:
- Natural wood branches of varying diameters (1-2.5 cm). Safe woods include apple, willow, birch, and eucalyptus. Avoid cherry, cedar, and any treated lumber.
- Rope perches for comfortable resting spots. Check weekly for fraying — loose threads wrap around toes and cut off circulation. I had a keeper message me in a panic last winter because their budgie's toe had turned dark from a thread tourniquet. We caught it in time, but it was close.
- A flat platform perch near a food station. Budgies with foot issues benefit from a resting surface that isn't cylindrical.
Place perches at different heights, but not directly above each other — droppings from above contaminate lower perches and food bowls. The highest perch becomes the sleeping perch, so position it away from the cage sides where drafts might hit.
Step 3: Food and Water Station Placement
Two food bowls minimum — one for pellets (or seed, if you're transitioning), one for fresh vegetables. A third for water, though some keepers prefer a water bottle to prevent droppings in the dish. I've used both and prefer open bowls because you can monitor water clarity and intake more easily. Bottles can clog without obvious signs.
Don't place bowls under perches. This should be obvious, but most factory cage setups do exactly this. Position bowls near a perch but offset to the side.
A cuttlebone or mineral block clipped to the bars gives your budgie calcium and beak-conditioning in one. For a deeper look at what goes into those bowls, the budgie diet breakdown covers pellet-to-seed ratios and which vegetables work best.
Step 4: Toys and Enrichment — Rotation Is the Secret
A budgie in an empty cage is a bored budgie, and bored budgies scream, pluck, or shut down. But cramming the cage with fifteen toys at once is just clutter that restricts flight space.
Three to five toys at a time is the sweet spot. Rotate them weekly — a "new" toy that's been out of the cage for two weeks becomes interesting again. Types that work:
Foraging toys — anything that makes the bird work for food. Woven grass balls stuffed with millet, treat clips with leafy greens. These simulate the foraging behavior budgies would spend hours on in the wild.
Shredding toys — balsa wood, palm leaf strips, paper. Budgies love destroying things. It's not aggression; it's occupation. A roll of unbleached paper threaded through the bars costs nearly nothing and keeps them busy for hours.
Swings and boings — most budgies love motion. A swing becomes a favorite sleeping spot for some.
Mirrors are controversial. A single budgie may bond to its reflection and become aggressive toward people, or it may simply enjoy having a "companion." I don't recommend mirrors for solo budgies who you're trying to tame. For paired budgies, it's less of an issue.
Bells, plastic beads, and anything with small removable parts need safety checks. If a budgie can fit a piece in its beak and pull it off, it will. Zinc-coated metal is toxic — stainless steel or nickel-plated only.
Step 5: Where to Put the Cage
Location matters more than most keepers think.
Yes: A living room or family room wall, at eye level or slightly above. Budgies want to be part of the action but need a solid wall behind them for security. One side open to the room, one side against the wall.
No: Kitchens (fumes from heated cookware kill birds rapidly), bathrooms (humidity fluctuations, aerosol sprays), garages, direct window sunlight (overheating), next to exterior doors (drafts and escape risk).
A friend of mine lost a budgie because the cage was six feet from the stove and she forgot about a non-stick pan heating empty. The bird was dead within minutes. I bring this up in every setup conversation now.
Avoid positioning the cage near speakers, TVs at high volume, or windows facing busy streets with flashing headlights at night. Budgies can have night frights — sudden panic in the dark — and visual disturbances make them worse.
Step 6: Lighting and Covering
Budgies need 10-12 hours of darkness for sleep. If your household keeps late hours, cover the cage with a breathable cloth at a consistent time each evening. This also reduces night fright triggers.
Full-spectrum UV lighting helps with vitamin D synthesis and natural behavior cycles if your cage isn't near a window with indirect sunlight. Position the light above the cage with a 12-hour timer. Not strictly mandatory, but the difference in feather quality and activity level is noticeable over months. If you're setting up enclosures for the first time, the exotic pet habitat setup fundamentals cover lighting, heating, and ventilation principles that apply across species.
The Finished Setup Checklist
You'll know the setup is right when your budgie actively uses the full cage — flying between perches at opposite ends, eating from both food stations, engaging with at least two toys, and choosing the highest perch for sleep. If your bird is parked in one corner all day, something about the layout isn't working.
The full budgie care guide covers diet, taming, and health alongside the cage setup — worth reading if you're starting from scratch.
FAQ
How often should I rearrange the cage?
Every two to three weeks, move a perch or swap a toy position. Budgies appreciate novelty but also need some consistency — don't rearrange everything simultaneously or you'll stress them. One change at a time.
Can I use a secondhand cage?
Yes, but scrub it thoroughly with a bird-safe disinfectant and inspect every weld, latch, and bar for rust, sharp edges, or zinc flaking. Galvanized wire cages are a zinc toxicity risk. If the previous owner had a sick bird, disinfection is non-negotiable.
Is cage liner or substrate better for the bottom?
Plain newspaper or unprinted butcher paper is the best option. It's cheap, easy to swap daily, and lets you monitor droppings — which is your earliest health indicator. Wood shavings hide droppings and harbor bacteria. Sand paper perch covers marketed as "nail trimmers" cause foot irritation. Keep it simple.